Monday, March 30, 2009

Zucchini Lasagna

Hey all. I hope everyone had a wonderful weekend! Oh, I forgot to mention that Friday was my One Year Blogiversary! I had no idea when I started this blog how many friends I would make but not actually meet. On those days when I feel like I am missing something I come here & feel complete. So, thank you!  One favorite blogger of mine is having me guest post at her Circus so go on over & check it out. Should be up at midnight.

So, the weekend was great, had some sushi & martinis, tennis with my best friend on Saturday morning, Monsters vs. Aliens with the little guy & this Zucchini Lasagna on Sunday night.

I found this in my Clean Eating magazine so you know it's healthy plus we all really enjoyed it!!!!!! 


1 large onion, chopped
4 cloves garlic, minced
24 oz jar low fat low sodium tomato sauce
1 lb extra lean ground chicken or turkey
Sea salt & black pepper, to taste
1 egg
2 cups low-fat cottage cheese
1 tsp whole wheat flour
1/2 cup skim mozzarella cheese, shredded & divided
2 1/2 medium zucchini, sliced into 1/4 inch pieces

Preheat oven to 350. In a large nonstick pan, saute onions & garlic over medium heat until tender. Add tomato sauce & ground meat & cook for about 10 minutes. Season with salt & pepper. Remove from heat.

In a small bowl, slightly beat the egg. Stir in cottage cheese, flour & 1/4 cup of the mozzarella. Pour 1/2 of the meat tomato sauce into a 1 1/2 quart roasting pan. Top with half of the zucchini slices & then all of the cottage cheese. Cover with remaining meat tomato sauce & zucchini. Bake uncovered for 30 minutes. Sprinkle with remaining mozzarella cheese & bake 10 minutes longer.

Let stand 10 minutes before serving.


{My Thoughts}

Recipe called for 2 garlic cloves but I always double it. The casserole dish I used was 2 quarts & was perfect. The standard 9 x 13 x 2 casserole dish would be a bit big so find the baking dish that works for you before you start. As for the zucchini, the recipe called for 2 medium zucchini but I found I used a little more. I also cut the zucchini to fit the pan just right.

The recipe did not specify whether the sauce should be a standard tomato sauce that you find with the diced tomatoes or the tomato sauce that's in with the spaghetti sauce so I opted for Classico Cabernet Marinara. It had the lowest amount of sodium of most of the others & was low in fat.

My only complaint here is that the lasagna was very watery as I pulled out the first few pieces. I needed a slotted spatula & had to serve it in bowls. However, the next few pieces were much better as you can see from the pics. I recommend you slice the zucchini, salt it generously & let it sit for 1/2 hour to draw out the moisture. Pat dry & then proceed. 


{Click Here to Print Recipe}


Visit Lisa at Blessed with Grace for more Tempt My Tummy Tuesdays! And I am hoping to have a couple of different bits of good news to share  in the next day or two, so stay tuned.

Friday, March 27, 2009

Steph's Shrimp Tostadas & Homemade Corn Chips

Another Not So Fat Friday.......

The other night I wanted something very healthy but satisfying, something that made me feel like I was being bad. I was solo so shrimp was going to be the star of my meal. I wanted to use whatever I had in the house so it was a fun little challenge. The result ~ I was very happy with how these turned out & will be making them again while trying out minor variations.

I needed no sour cream or shredded cheese. Just the healthy fat in the avocado was enough to hit this home for me!!!


STEPH'S SHRIMP TOSTADAS

About 10-12 shrimp uncooked, peeled & deveined
Fajita seasoning
Corn tortillas
Sea salt
Garlic powder
Chili powder
Cilantro
1/2 small red onion, sliced
3 tblsp Chipotle Bean Dip with Roasted Garlic
1/4 Avocado, diced
Hot sauce (optional)


Toss shrimp with Fajita seasoning. Set aside.

Pre-heat oven to 375. Place two corn tortillas on a baking sheet. Brush both with water. Sprinkle some sea salt, garlic powder, chili powder & cilantro on each. Bake for 12-15 minutes until crispy. Feel them at this point. If they need to be a bit crispier & browned put them 6 inches from your broiler for about 1 minute. Watch carefully. Set aside.

When the tortillas have a few minutes left to go, heat a pan on medium high heat sprayed with cooking spray. Saute red onion for a few minutes. Add shrimp & cook until opaque, about 3 minutes. Place shrimp & onion in a bowl.

To assemble tostadas, spread 1/2 bean dip on each tostada. Top with about 5 shrimp with onions as well as the diced avocado. Pour a little hot sauce over each, if desired.


{My Thoughts}

If you don't have fajita seasoning, no big. Just sprinkle the shrimp with some garlic powder, chili powder, cumin & cayenne pepper. I had the Chipotle Bean Dip in the house but I think I would rather a regular bean dip, as long as it has hardly any fat & it's not high in sodium. I am a big fan of Eat Smart's Tres Bean Dip which I will try next time.

As for corn tortillas, read your labels. One package had them at 60 calories each. Another was only 25!!!!! And while I love flour tortillas, corn is much better for you.


~~~~~   ~~~~~   ~~~~~   ~~~~~   ~~~~~

HOMEMADE CORN CHIPS

Also, as a little added bonus today, I have to share with you my latest guiltless indulgence. Chips are my weakness so I needed to do something that would help me in a time of need. 


Take 4 corn tortillas & cut them in quarters. Place on baking sheet. Brush with lime juice instead of water. If you don't like lime in your chips, just use water. Sprinkle with sea salt, garlic powder & chili powder. Bake at 375 for 12-15 minutes, throwing them under the broiler for about 1 minute for extra crispiness. Let cool for a few minutes. Dip into bean dip, salsa verde or regular salsa for a guiltless snack.

What I really love about these is that I only make 4 at a time so I can't just stick my hand back in a bag to get a few hundred more calories. Hey, I know my weaknesses!!!!!


Have a great weekend everyone! I can't wait to play catch up & come visit you!!!

Thursday, March 26, 2009

Going on a Picnic & Bringing Apples, Bananas....

Apple Toffee Crisp & Banana Chocolate Chip Bread that is.....

I figure before we go into Not So Fat Fridays tomorrow, bring on the Fat!! I kid, but everything in moderation right?!

I made a Banana Bread from Emeril a while back which was excellent but this past weekend I tweaked it a bit & it was even more delicious. So moist, with a great banana taste, I added some chocolate chips & one more banana. That extra one made a difference because I feel some recipes don't call for enough. I won't add the recipe here again but you can click below to view it. I had to give away half of it before I ate the whole thing. I am not a huge dessert person so that goes to show how good it was. 

BANANA BREAD with chocolate chips


{Click Here to Print Recipe}

~~~~~~~~~~~~~~~~~~~~~~~~~~~~~~~~~~~~~~~~~~~~~~~~~~~~~~~

The following is a little original creation. Last month my mom & brother came for a quick visit after dinner so I wanted to throw together something quick & easy for dessert with whatever I had in the house. It was a fun challenge & came out pretty good. We'll call it...

APPLE TOFFEE CHOCOLATE CRISP

4-5 apples, cut into wedges
1/3 cup Toffee bits
1/4 cup Semi-sweet chocolate chips
1/2 pkg Yellow Cake Mix
1/2 stick melted butter
Ice cream (optional)

Pre-heat oven to 375. Place apples in the bottom of a round baking dish. Mix the yellow cake mix with the toffee bits & chocolate chips. Distribute the dry mix evenly over the apples. Drizzle the melted butter over the mix. Bake for about 25-35 minutes. Serve with ice cream.

{My Thoughts}

If you use a larger baking dish than the one pictured in my recipe, like a standard 13 x 9 x 2, then use more of each ingredient & all of the cake mix. It's been a while since I made this so I can't recall the exact time. Just check your oven after 25 minutes & in 5 minute intervals thereafter. It's done when the top is brown & bubbly. 

Tuesday, March 24, 2009

Staycation....All I Ever I Wanted

Canceling a mini vacation on the Gulf Coast last week meant creating little adventures with my little guy, right here.


Scenic boat tour around Winter Park, FL:


{My little guy Tristan}


{Christmas decorations adorning trees}


{Beautiful homes}


{Tom Hanks filmed a movie here}


And this could only mean one thing:


{don't let the personalized bowling ball fool you}

Tristan's 1st try at bowling:


Not shown is the walk Tristan & I took into our town, 2 1/2 miles each way with a stop for lunch. My little guy just kept on going, not once wanting to relax in his stroller.

Sometimes being close to home is all the R&R one needs!


Brought to you by Angie & Wordful Wednesdays from:


Monday, March 23, 2009

Baked Orange Roughy

I made this fish quite some time ago from Trisha Yearwood's Georgia Cooking cookbook. I was holding out posting it until I could make it again & take better pictures but the time never comes since I love making new things, unless my husband begs for a repeater. So, look past the blurriness of the pic into the flakiness of the fish. It really was delicious. 


2 cups dry bread crumbs
1/2 cup grated Parmesan cheese
1/2 cup chopped fresh parsley (or dried)
1 tsp paprika
1 tsp dried oregano
1/2 tsp dried basil
2 tsp salt
1 tsp pepper
6 orange roughy fillets
1 cup buttermilk, well shaken
Lemon wedges, for serving

Pre-heat oven to 375. In a large flat dish, mix first 8 ingredients. Spray a baking dish with cooking spray. Dip each fillet in the buttermilk & then coat it with crumbs, pressing to be sure they adhere. Arrange the fillets in the baking dish & bake uncovered for 25 minutes or until the fish flakes easily with a fork. Serve with the lemon wedges.


{My Thoughts}

I used dried parsley. As always, use 1/3 of what the recipe states if you switch from fresh to dried herbs. 1/2 cup = 8 tblsp so I used just less than 3 tblsp of dried parlsey. I also used milk instead of buttermilk to cut down on fat & probably would again.

{Click Here to Print Recipe}


Please Visit Lisa at Blessed with Grace for more Tempt My Tummy Tuesdays!!!

Friday, March 20, 2009

Mexican Shrimp Cocktail

Happy Friday everyone! And it's Not So Fat!!! It's funny, since being laid off in January, you would think everyday is a Friday to me but I still get the blues sometimes on Monday, get into the mojo of the week by Tuesday evening & then ready for the weekend on Friday. 

Last weekend some family came over & I had a Mexican themed dinner with this shrimp cocktail as my appetizer. I served Turkey Enchiladas as the main meal & the Mexican Chocolate Icebox Cake for dessert. Everyone loved this appie & I loved serving them in martini glasses. Margarita glasses would be even better but I didn't have enough. 


2 pounds cooked shrimp, peeled & deveined (Tail On)
1 tblsp crushed garlic
1/2 cup finely chopped red onion
1/4 cup fresh cilantro, chopped
1 1/2 cups tomato & clam juice cocktail
1/4 cup ketchup
1/4 cup fresh lime juice
1 tsp hot pepper sauce, or to taste
1/4 cup prepared horseradish
Salt to taste
1 ripe avocado - peeled, pitted & chopped

Place the shrimp in a large bowl. Stir garlic, red onion & cilantro. Mix in tomato & clam juice cocktail, ketchup, lime juice, hot pepper sauce & horseradish. Season with salt. Gently stir in avocado. Cover & refrigerate 2 to 3 hours. Serve in one large bowl or ladle into individual bowls.


{My Thoughts}

I halved this recipe which yielded about 24 large shrimp & gave me 6 appetizer servings of 4 shrimp each. I highly recommend refrigerating this for closer to 3 hours if possible to let the flavors marry. Instead of the tomato & clam juice cocktail I used a spicy V8 & would again. 


Have a wonderful weekend everyone. I am looking forward to playing catch-up & coming around to visit new faces who have come to say hello this past week. 

Thursday, March 19, 2009

Tortellini Florentine Soup

I made this a couple months ago & it dawned on me I'd better post it before it got too warm for anyone to care about soup. I am at that point here in sunny Florida but I wanted to catalog this for future reference simply because it was tasty enough & extremely easy to throw together. While I found it in my BHG mag, I did make some tiny modifications. 


(1) 9oz pkg refrigerated 3-cheese tortellini
(2) 14oz cans reduced sodium chicken broth
(1) 10oz container light Alfredo pasta sauce
(2) cups shredded rotisserie chicken
(1/2) cup sun dried tomato strips, packed in water & drained
(3) cups fresh baby spinach
(1) oz parmesan cheese

In a 4 quart pot, cook tortellini according to package directions. Drain & set aside. In the same pot, combine broth & pasta sauce. Stir in chicken & tomato strips. Heat just to boiling; reduce heat. Simmer, uncovered, for 5 minutes.

Ad cooked tortellini & spinach to chicken mixture. Cook for 1-2 minutes to heat through & wilt spinach. Ladle into bowls & sprinkle with parmesan cheese.

{My Thoughts}

While Alfredo sauce is heavy, it's really lightened up by being combined with the broth. I imagine this is a forgiving recipe & you could also use just about any other sauce you like. Just combine it with the broth for a light meal. 

Tuesday, March 17, 2009

Precious Moments

12  laughs ,


5  hugs ,


15  smiles :    $0


Stuffed puppy :    $25


Cousins meeting for the 1st time : priceless

{my son Tristan with his cousin Makayla}


Brought to you by Angie & Wordful Wednesdays from:


Monday, March 16, 2009

Mexican Chocolate Icebox Cake

A brownie can sit on my counter for days, untouched. Same goes for a chocolate bar or even a huge slice of chocolate cake. But put a piece of this cake in front of me & I will have a hard time saying no. I probably wouldn't even try.

I made this last weekend for my Mexican themed dinner for a small family get together. I had a slice each day after & it was just so delicious. Although there are layers of chocolate in between ladyfingers & homemade whipped cream, there is something very light about this. The hint of cinnamon is perfect to boot. Make this & your guests will be impressed. Believe me, it looks harder than it is!!!! And it's more delicious than it looks!!!


60 sponge-cake-type ladyfingers (from three 3-oz pkgs)
2 3/4 cups chilled whipping cream
4 oz unsweetened chocolate, chopped
1/4 cup sugar
1 cup plus 2 tablespoons powdered sugar
1/2 cup (1 stick) unsalted butter, room temperature
2 tsp vanilla extract
1 tsp ground cinnamon
1 oz semisweet chocolate, grated


Line bottom of 9-inch-diameter springform pan with ladyfingers. Line sides of pan with ladyfingers, standing ladyfingers side by side & rounded side out. Stir 3/4 cup whipping cream, unsweetened chocolate & 1/4 cup sugar in heavy small saucepan over low heat until chocolate melts & mixture is smooth. Remove saucepan from heat & cool to room temperature.

Using electric mixer, beat 1 cup powdered sugar, butter & 1 tsp vanilla in large bowl until blended. Beat in cooled chocolate mixture. Combine remaining 2 cups cream, 2 tblsp powdered sugar, 1 tsp vanilla & cinnamon in another large bowl. Using clean dry beaters, beat until peaks form. Fold half of whipped cream mixture into chocolate mixture.

Spread half of chocolate filling in ladyfinger-lined pan. Top with layer of ladyfingers, then remaining chocolate filling. Pipe or spread remaining whipped cream mixture over filling. Sprinkle with grated semisweet chocolate. Refrigerate until firm, at least 3 hours. (Can be made 1 day ahead. Cover and keep refrigerated.) Remove pan sides from cake & serve.


{My Thoughts}

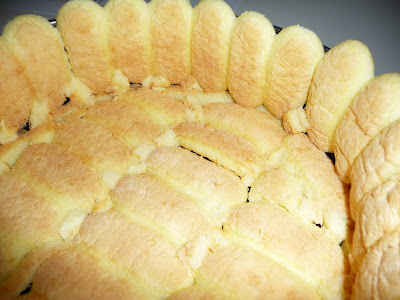
The original recipe doesn't state this but when laying the ladyfingers down, you will want to cut small pieces to fit where you need it (see above). Once I line the sides of the pan with the ladyfingers I plug up any small holes. This time I was so efficient at it that I had no ladyfingers left. In the past I always did.

Also, when whipping the whipped cream, be patient. It can take about 5 minutes. Once you see the peaks forming stop. If you continue to whip then it will curdle on you. If this happens, the taste is still fine but it just won't look as pretty.

Saturday, March 14, 2009

Spring Fling Winner...

is Simply B!!!!!

Here are your random numbers:

95

Timestamp: 2009-03-11 23:34:42 UTC

Thanks to everyone who came by, said hello, expressed interest & let me know your favorite dishes. I was salivating at the mention of some of them. This was my 1st giveaway & it was loads of fun. See you soon!

Thursday, March 12, 2009

Breakfast at Stephanie's - Not So Fat Fridays

I'm no Audrey Hepburn but you get an open invite for breakfast at my place for Not So Fat Fridays. I have coffee when I first wake up but after I finish my morning walk/jog I like something healthy but satisfying. Lately, I have been picking one of these fresh start goodies. 

I saw this recipe at Netts Nook. You'll feel just peachy after this!


PEACH PIE SMOOTHIE

1/2 cup low fat milk
1/2 plain yogurt
1 cup frozen peaches
1 tablespoon honey
1/4 teaspoon vanilla
1/8 teaspoon cinnamon
pinch of nutmeg
pinch of ginger

Blend all ingredients together. Use crushed ice if you'd like. I like to sprinkle a little cinnamon on top.


~ ~ ~ ~ ~ ~ 

Or....


Sometimes I like a change over the traditional closed omelet. This one looks pretty because you can see your fillings & all the pretty colors.

OPEN FACED FLORENTINE OMELET 

Fresh baby spinach
Mushrooms
Tomato, chopped
2 tblsp salsa
1-2 eggs, lightly whisked
Garlic, basil, oregano
Salt & Pepper
Gruyere cheese (or whatever you have on hand)

I make this a little different each time depending on what I have in the house. First, heat a small pan with cooking spray. The size of your pan dictates the size of your omelet. Saute your veggies. In this case, you would throw in the mushrooms first since they take a bit longer. Add the spinach & tomato since the spinach will wilt in the time it takes for the tomato to just warm through. Sprinkle with a little garlic, salt, pepper, basil & oregano. You can give or take whatever spices you enjoy.

Add the salsa. This is optional but I had leftover I wanted to get rid of. At this point, spread your veggies out around the pan. Lightly spray your pan again, especially around the edges of the pan like you see below. 


Pour your eggs over the veggies. As the eggs settle, take your spatula & scrape down the edges since you don't want that ugly thin film that develops. Put your heat on medium for a few minutes. Tilt your pan around so that the uncooked egg on top slides to the edges & underneath, then switch to medium low for a few minutes so that the top of your omelet cooks through without the bottom getting overdone. 

Just before the top looks like it's not shiny & wet anymore, sprinkle just a little cheese over the top & some basil. Slide your omelet out onto a plate. If it doesn't look like it wants to cooperate, just put a plate over your pan & turn your pan upside down. 


~ ~ ~ ~ ~ ~

Or... 

I like it stacked!


Sometimes I just want that drippy egg & some heart whole wheat bread for breakfast. Toss in some color from the spinach & tomato & I know I am starting off the day right.

FLORENTINE EGG SANDWICH

Fresh baby spinach
1 thick slice tomato
1 large egg
Salt & Pepper
Whole wheat English Muffin
About 1 tblsp shredded Colby Jack (or whatever you have on hand)

In a pan coated with cooking spray, cook your egg to your liking alongside the spinach & tomato. Sprinkle with salt & pepper. Toast your English Muffin. Stack it however you like & sprinkle with cheese.

~ ~ ~ ~ ~ 

Have a wonderful weekend everyone! Tonight I am having some family over for a Mexican themed dinner so I better get my meds & get to cleaning! 

Monday, March 9, 2009

SITS Spring Fling & Tempt My Tummy Tuesdays.

The SITS Spring Fling is today! 

For those of you living under a rock who don't know by now, that stands for The Secret's In the Sauce, a blogging community dedicated to supporting one another in the way of comment love. Today, SITS is hosting a major giveaway carnival where there will be prizes every hour. Everyone in the SITStahood is also hosting a giveaway on their site. Visit HERE to see details.


{For my giveaway, I thought it would be appropriate to give away some cookbooks. While a couple hold a special place in my heart, I am willing to part with them for a fun cause. For one entry, just tell me what your favorite dish is (not something from my blog). For two entries, put me on your blogroll.

The winner will be randomly selected & I WILL CONTACT YOU Thursday! I will also make a variation of the dish you mentioned & link to you when I do. Giveaway closes 11:59 PM EST. 

The Cowboy's Cookbook - I had to have it, how else could I know how to make Son of a Bitch Stew & Texas Longhorn Chili.


On to more love............

~ ~ ~ ~ ~

RED CURRY SHRIMP

I am just loving Thai more than ever lately & when the urge hits, there's nothing I can do but give in. This dish was so easy to throw together & so delicious. Even if you don't like yellow curry, you may find you love red curry. Such different flavors. I like it spicy so I added in a bit more red curry paste to my coconut milk. 


1 (14 oz.) can lite coconut milk, divided 
1 1⁄2 tblsp red curry paste
1 tblsp brown sugar
2 kaffir lime leaves, minced (optional)
1 lb. large shrimp, shelled & deveined
2 tblsp fish sauce (or soy sauce) 
1⁄4 cup basil, chopped (I used dried)
Jasmine Rice

In a wok or heavy skillet heat half a can of the coconut milk. Stir in red curry paste & cook until well blended. Add the remaining coconut milk, brown sugar & kaffir lime leaves & bring to a boil. Reduce heat & simmer for 5 minutes. Add shrimp & cook until shrimp are orange-pink in color, about 1-2 minutes. Stir in fish sauce & chopped basil. Serve with Jasmine rice. Makes 4 to 6 servings.


{My Thoughts}

I did not use fresh basil for this which is just fine. Remember when substituting dried in place of fresh, to use 1/3 of the recipe amount for fresh. Also, I did not use kaffir lime leaves. If you have an aversion to fish sauce you can use soy sauce instead.  But I promise, you can't tell it's in there, it just contributes to the overall flavor.


For More Tempt My Tummy Tuesdays, please visit Lisa at Blessed with Grace.


Friday, March 6, 2009

Honey-Orange Chicken with Sesame Sauce

Hello. It's Not So Fat Fridays. May I take your order? You pickup in 20 minutes.

I kid. And this is definitely healthier than takeout. So light & tasty, it surpassed both mine & Terry's expectations. While I love citrus including oranges, I am not one to jump on citrus-y dishes yet I really enjoyed this. The bonus is I had everything in the house to make it. And just a recommendation - it just wouldn't be the same without the jasmine rice! 

315 calories per serving. Yields 4 servings. 

3/4 cup fresh orange juice
1/3 cup orange blossom or clover honey
1 tsp grated ginger (or ground works fine)
1 tsp garlic
1 tsp orange zest
1 tsp salt
1/8 tsp ground black pepper
4 boneless, skinless chicken breasts
1 tsp vegetable oil
1 tsp toasted sesame oil
1 tsp toasted sesame seeds

Combine juice, honey, ginger, garlic, orange zest, salt & pepper in a bowl. Add chicken; stir to coat. Cover; refrigerate 30 minutes. Heat a large skillet over medium heat until hot; add vegetable oil & swirl to coat. Lift chicken from marinade & let excess drip back into bowl. When oil is hot, add chicken & cook over medium heat 3 minutes per side, or until golden brown.

Add reserved marinade to skillet & boil over medium-high heat, turning chicken once or twice, 3 to 5 minutes, or until chicken is cooked through & sauce is reduced by half. Transfer chicken to a cutting board, cut into diagonal slices & arrange on a platter. Stir sesame oil into thickened sauce & spoon it over chicken. Sprinkle with sesame seeds. Serve with jasmine rice if desired.


{My Thoughts}

To toast the sesame seeds, just place in a saucepan over medium high heat for 4-5 minutes, moving around frequently so they don't burn. I also used ground ginger rather than fresh & would again. Just use 1/3 the amount when using dried as opposed to fresh.

If you're worried about using the marinade from the chicken as the sauce, just start boiling it in a separate pan while the chicken cooks. I did this for a few minutes prior to adding it to the chicken cooking, just to be safe.


So if I asked to take your order, what would you ask me to make?

Wednesday, March 4, 2009

Roast Pork Fried Rice

With fried rice like this, there's no need to do Chinese takeout!!!! In fact, since I have been cooking more Thai & Asian at home, I can't remember the last time I did takeout. So flavorful & so easy, we just loved this rice. I made it once with no meat & then recently with a leftover pork tenderloin. I marinated the pork tenderloin in an Asian type of marinade before knowing I would be using the leftovers in a fried rice dish. So, it's up to you but I do highly recommend it. 

If you don't use pork, then chicken or shrimp would be just as delicious. Or plain if using as a side dish. Next time it's chicken & shrimp for me!!! I normally don't use the prepared, processed, seasoning products on the market like those pasta helpers etc., but this packet is only 3/4 oz with about 8o calories for the whole dish which yields 5 cups. Not bad at all. And oh so yummy!!!!


ROAST PORK FRIED RICE

Fried Rice Seasoning Mix (in Ethnic section of your grocer)
Meat of your choosing (about 1 to 1 1/2 cups)
2 tblsp oil
3 cups cooked, cold rice
3 green onions (scallions) sliced plus for garnish
2 tsp soy sauce
2 eggs, beaten
1 cup frozen peas, cooked (optional)

In large skillet, heat oil. Stir fry rice & green onions. Add seasoning & soy sauce. Stir fry 1 minute. Push rice to side, add eggs & scramble. Stir into rice. Add peas & meat if desired. Garnish with fresh scallions on top.


PORK TENDERLOIN MARINADE

2 tbsp. soy sauce
2 tbsp. Hoisin sauce (Chinese Barbecue Sauce)
2 tbsp. dry sherry
1 tbsp. brown sugar
1 tbsp. oil
1 1/2 tsp. honey
1/2 tsp. garlic powder
1/2 tsp. cinnamon
2 pork tenderloins

Mix together all ingredients. Pour over pork & marinate in refrigerator 6-8 hours. Grill or cook per your preferred method. I roast it in a 500 degree oven for 25-30 minutes. 


{My Thoughts}

My only note is to use a non stick pan for this dish. There isn't much oil & the rice sticks. I didn't use a non stick & was scraping the bottom every chance I had. But maybe that lended to the flavor?!

Foolproof Steak Cooking Chart

I rarely mess up a steak on the grill. That's because I have been using this little chart for over 5 years. I've been holding back, I know, but I just thought that if I knew then the whole world knew. I don't give myself credit sometimes. So, here it is. If you want perfect steak & not just good steak, use it, you will not be sorry!!!!!

Yes, I actually do take a ruler to my meat & then go according to the chart. The chart can also be found here.


Some of my own tips for steak grilling: 

  1. Take your steaks out of the fridge about 15 - 30 minutes prior to cooking.
  2. Be aware of the hot spots on your grill.
  3. All you need is salt, pepper, garlic powder & a little lime juice. Salting just prior does not dry out the steak or draw out moisture. The lime juice helps to break down the fibers giving you tenderness!
  4. Only flip steak once.
  5. Don't keep opening your grill. Maybe check once to make sure there are no flare ups. 
And........


Always - let your steak rest for 3-4 minutes before slicing into it. You will then see the true doneness since it continues to cook, as well as let the juices run back to the middle, giving you a very juicy, moist & delicious steak. I swear by this rule.


Brought to you by Angie & Wordful Wednesdays from:

Monday, March 2, 2009

Spinach Artichoke Stuffed Tomatoes

I hope everyone had a great weekend. Friday night my best friend Tam & I went into my sweet little town to the new theatre to see the Iliad, the Odyssey & all of Greek Tragedy in less than 99 minutes. It was a comedic overview of all the characters we learned yet forgot about in school. We felt like teenagers as we snuggled red wine into Pomegranate juice containers & no one was the wiser. The show was entertaining but thank goodness for smuggled wine & best friends!!!!!

Other great friends of mine opened a new frozen yogurt store in town called Yogo. They serve non-fat natural frozen yogurt, plain & green tea, as well as smoothies, with toppings to make it all complete. I brought these delicious & beautiful stuffed tomatoes to their grand opening on Saturday. 

Oh, my favorite treat is the regular yogurt with granola, strawberries & drizzled honey. I wish my friends Nicole & Jonathan all the success in the world!!!!


These tomatoes were really wonderful & made a perfect appetizer!!!!!!


1 pkg (3 oz) cream cheese, softened
1/2 cup light mayo
1/2 cup light sour cream
1 can (14 oz) water packed artichoke hearts, drained, rinsed & chopped
1 pkg (10 oz) frozen chopped spinach, thawed & squeezed dry
1/3 cup shredded part-skim mozzarella cheese
4 tblsp grated parmesan cheese, divided
3/4 tsp garlic salt
78 cherry tomatoes
Fresh chives for garnish (optional)

Cut a thin slice off the top of each tomato. Scoop out pulp using an 1/8 tsp measurer & your finger, leaving a 1/2 inch shell. Invert onto paper towels to drain. Set aside. I prepped mine the night before & left them on the counter covered in a towel. If you put them in the fridge the tomatoes may become too meaty.

In a small bowl, beat the cream cheese, mayo & sour cream. Stir in the artichokes, spinach, mozzarella cheese, 3 tblsp parmesan & garlic salt. Fill each tomato with the filling using the same 1/8 tsp measurer.

Serve chilled or place on a foil lined baking sheet. Bake at 400 for 5 minutes until warmed.


To serve, I put crushed ice in ziploc bags, placed lettuce leaves over them & the tomatoes on top keeping them safe to lay out for awhile!


{My Thoughts}

The 1/8 tsp measurer is your best friend for this recipe. I wouldn't do it without it. Also, I used 1/2 tsp garlic salt rather than the 3/4 tsp. Taste for yourself & then add more if necessary. Also, I only used 3 tblsp parmesan cheese because I didn't want extra on top since I was leaving these cold. If I was to bake them then I would use the extra amount.

If you are transporting these then line whatever you are using to store them with something that will keep the tomatoes from falling over. At first I used aluminum foil but this did not work. A ribbed dishtowel works perfectly!!!!! If you garnish with the chives, snip them in half & use the chives that have very sturdy ends. You will notice if they are too soft to put through the mixture to stay. I placed 2 chives in the tomatoes, sporadically.

{Click Here to Print Recipe}


Dear friend Tam came to support the grand opening! Rockin' the bright beautiful colors in the background at Yogo.


Tristan was our entertainment, rockin' out!

For more Tempt My Tummy Tuesdays 
please visit Blessed with Grace!